
I still remember the first time I wandered into the Artisanship Commission on the Xianzhou Luofu and noticed a strange puzzle icon glowing on the map. It looked different from the usual exploration markers, and that tiny re-doable symbol told me I was about to deal with something more involved than a simple chest. Even in 2026, with so many newer planets and modes in Honkai: Star Rail, I think this older puzzle chain is worth finishing. It is calm, spatial, and just tricky enough to make me feel clever when the beams finally connect.
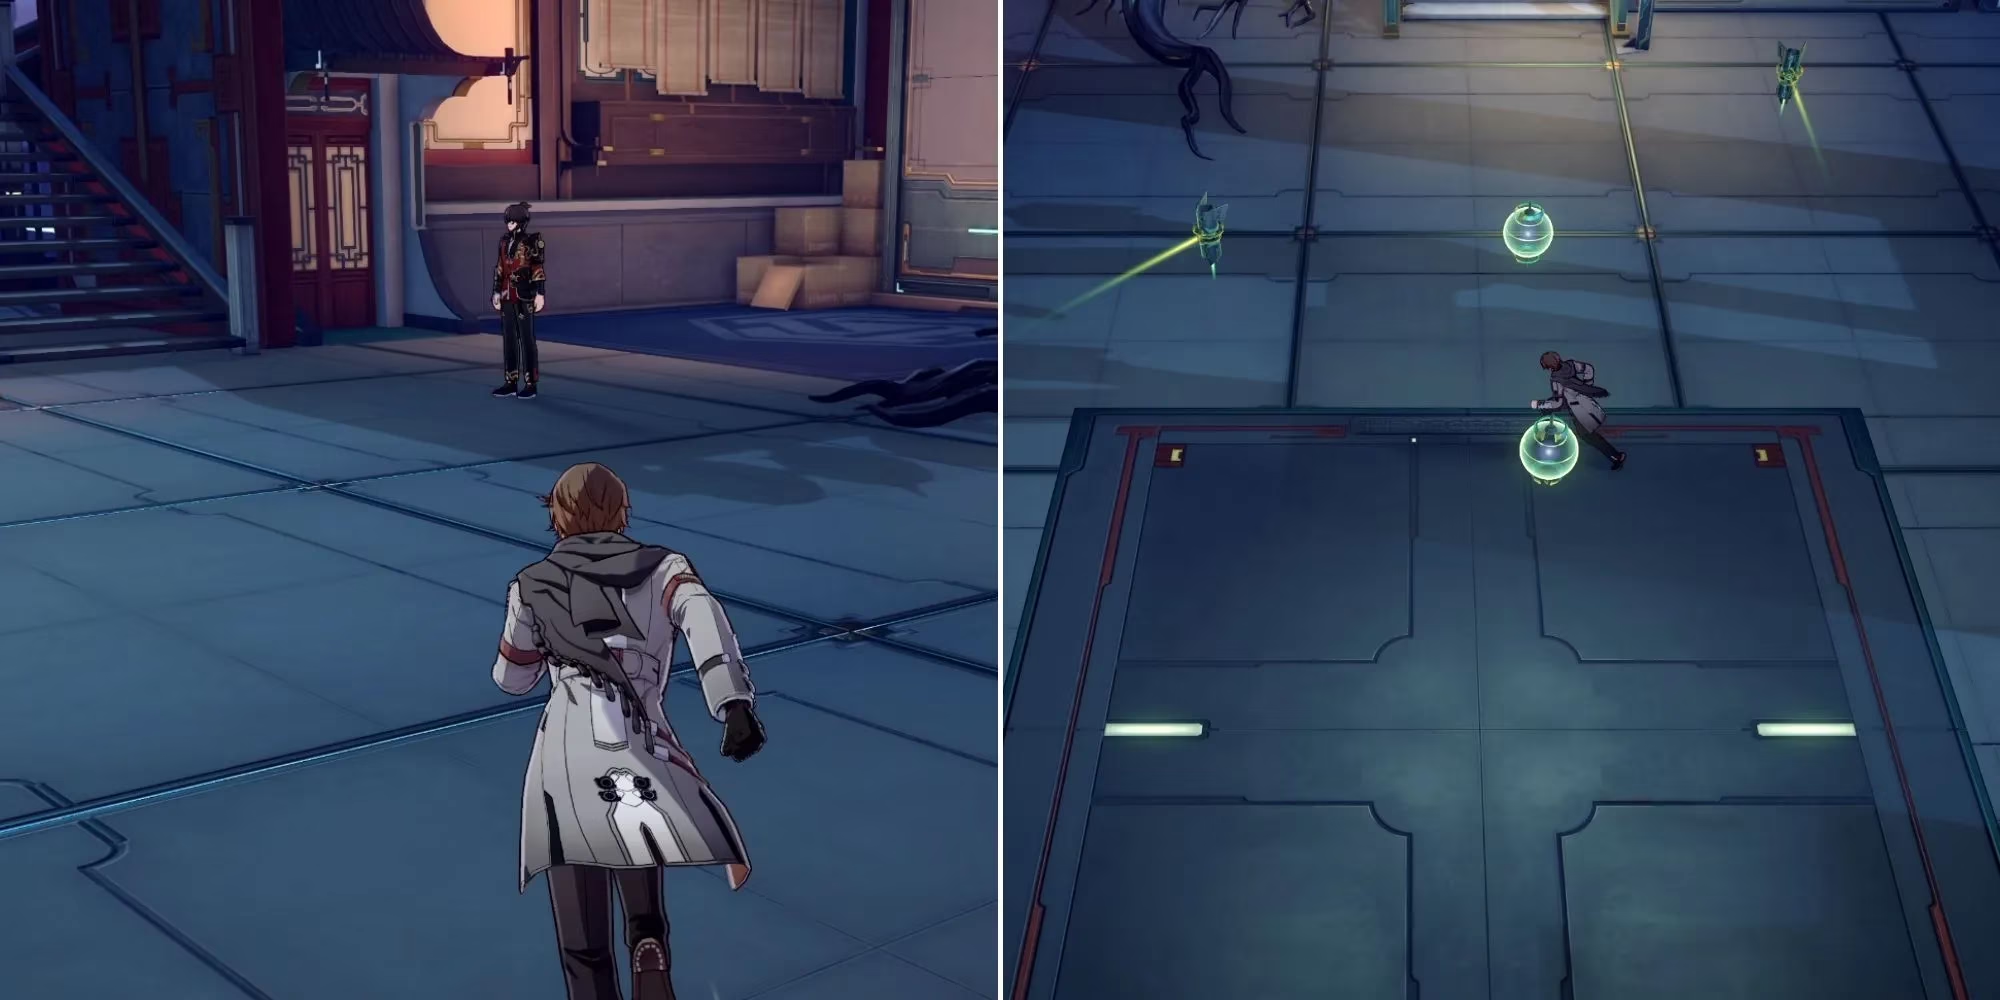
To start, I had to finish the main story until the Artisanship Commission area unlocked. Once I was there, Master Gongshu was waiting near the special puzzle icon. After I spoke with him, he spawned the first Luminflux Pyxis board. The setup is simple at first: several pillars emit light in fixed directions, and one pillar has a green circle underneath it. That green circle marks the starting point, so I always treated that pillar as the launcher. When a ray hits another pillar, it continues in the direction that pillar's light is facing. I could rotate pillars clockwise and counter-clockwise, and on later days I could also slide certain pillars along movement bars.
The whole chain takes three real-life days. Each day lets me solve about three puzzles before I have to wait for the next server reset. I liked that pacing because it turned the puzzle into a short daily ritual instead of a single exhausting session. I also started numbering the pillars in my notes, which saved me from confusion once the boards became crowded.
How the Luminflux Pyxis works
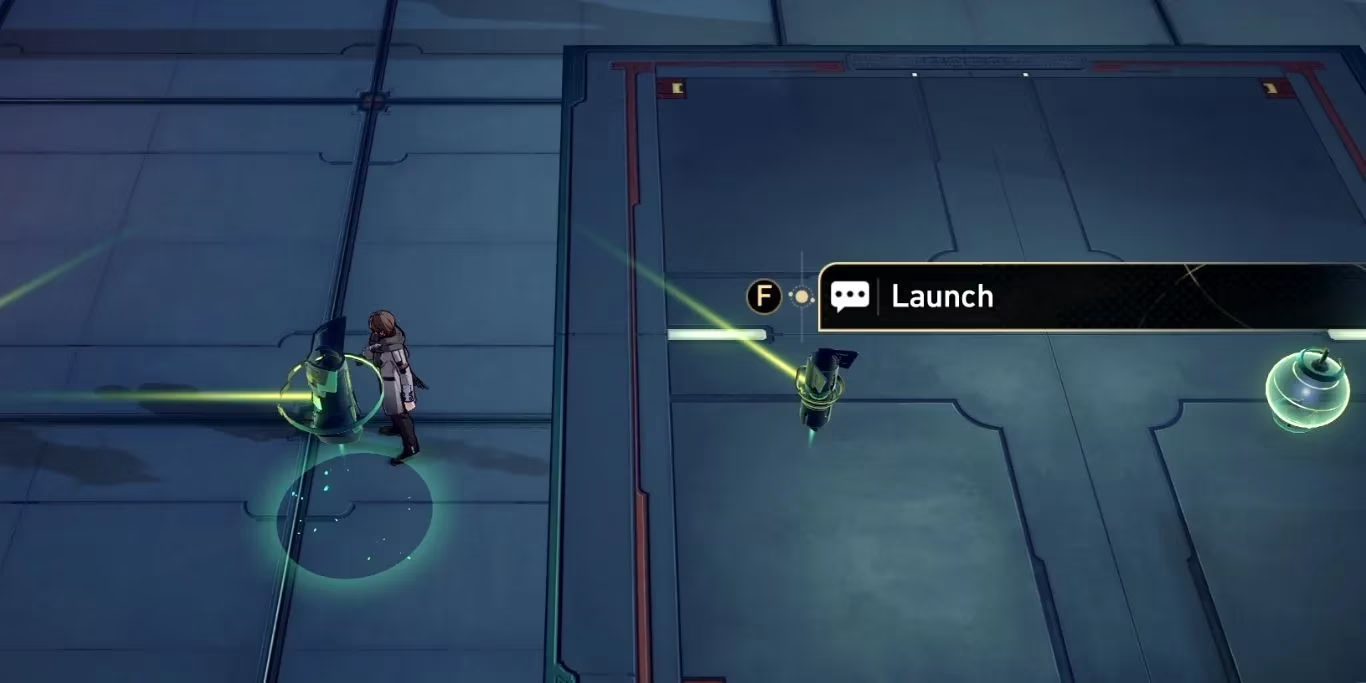
My main advice is to slow down and trace the beam with your eyes before touching anything. The launcher is the pillar with the green circle. Every other pillar bends or redirects the light according to its facing direction. Rotation changes the direction; movement bars change the position. On the second and third days, some pillars can be moved, so I learned to slide first and rotate second. That order kept me from wasting clicks.
| Day | New mechanic | What I focused on |
|---|---|---|
| Day 1 | Rotation only | Counting clicks carefully |
| Day 2 | Movement bars appear | Sliding pillars before rotating |
| Day 3 | Mixed movement and rotation | Tracing the full beam path |
Day one: learning the beam
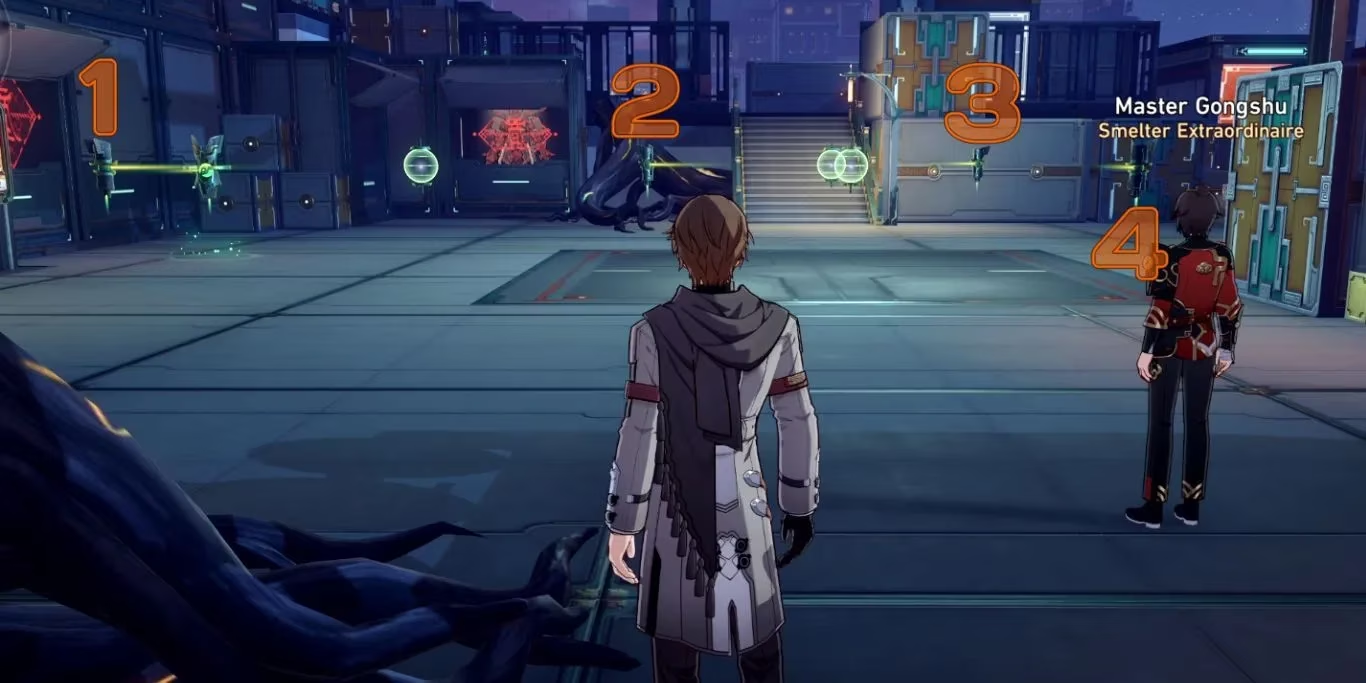
The first day is forgiving. I only had to rotate pillars, and the boards were small enough that mistakes were easy to fix. For the first puzzle, I rotated the left pillar counter-clockwise once so it faced northeast. The middle pillar needed two counter-clockwise rotations to face southeast. I turned the top-left pillar clockwise once so it aimed at the nearest balloon. Finally, I rotated the bottom-right pillar counter-clockwise once so it faced the third pillar above it.
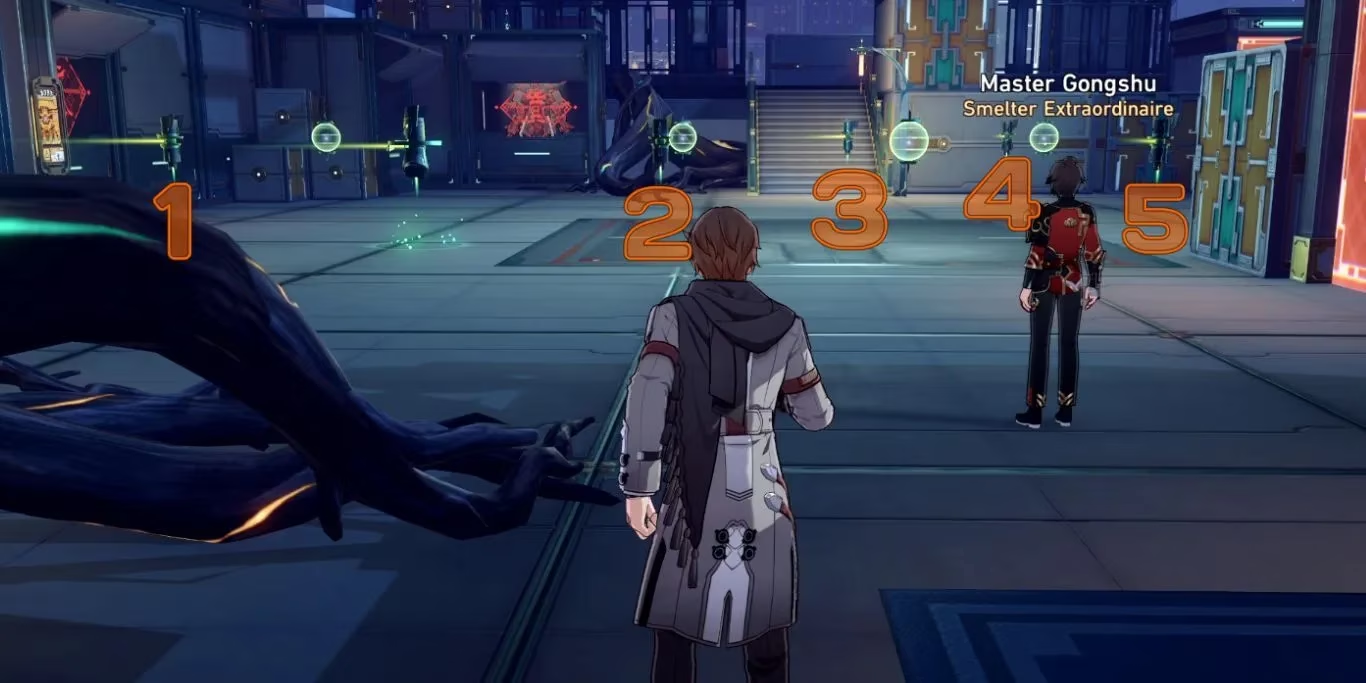
The second puzzle introduced five pillars. I rotated the left pillar clockwise three times to face northeast. The bottom-middle pillar only needed one counter-clockwise rotation. The left pillar on the top side was third, and I rotated it counter-clockwise three times so it faced the pillar to its right. The fourth pillar, to the right of the third, started facing upward; I rotated it four times in any direction so it faced downward. Then I rotated the bottom-right pillar counter-clockwise twice.
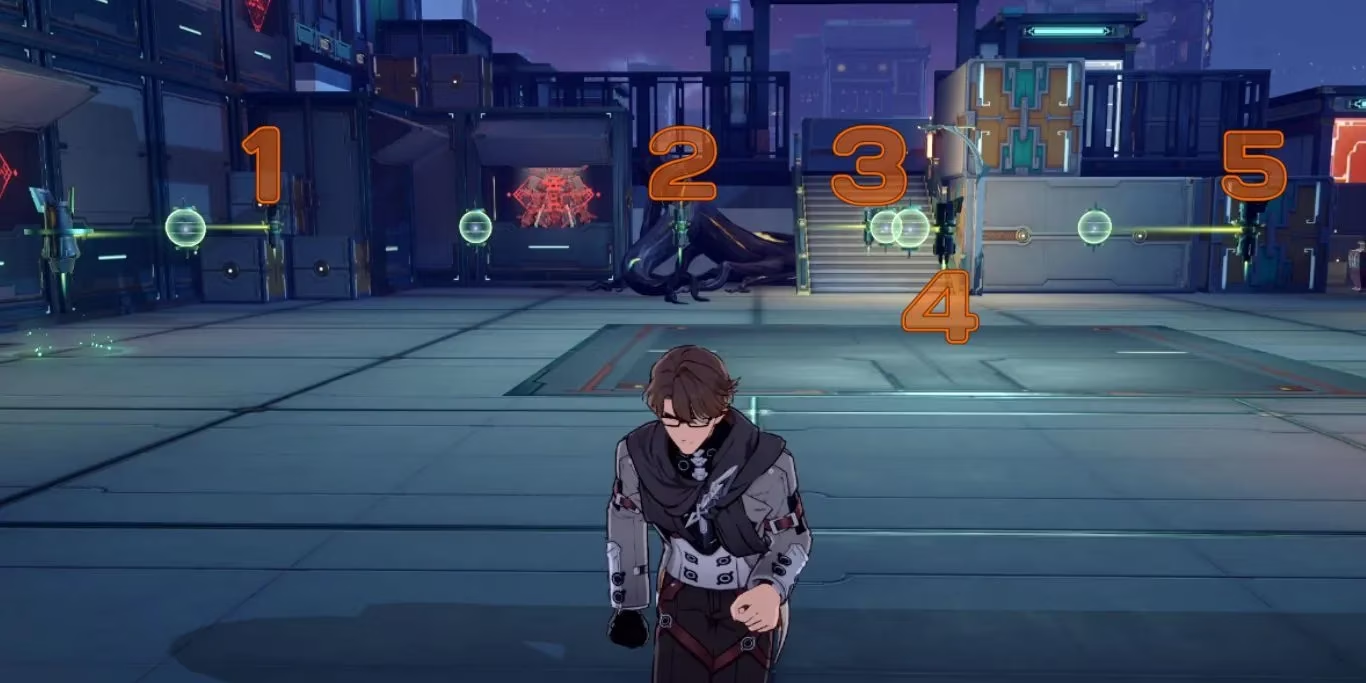
For the final puzzle of day one, I rotated the left pillar four times in any direction so it faced the balloon to its right. The pillar to its right needed three clockwise rotations to face southeast. The secluded pillar at the top needed two counter-clockwise rotations. The middle-bottom pillar did not need to be touched, and I kept the fifth pillar facing left.
Day two: movement bars change everything
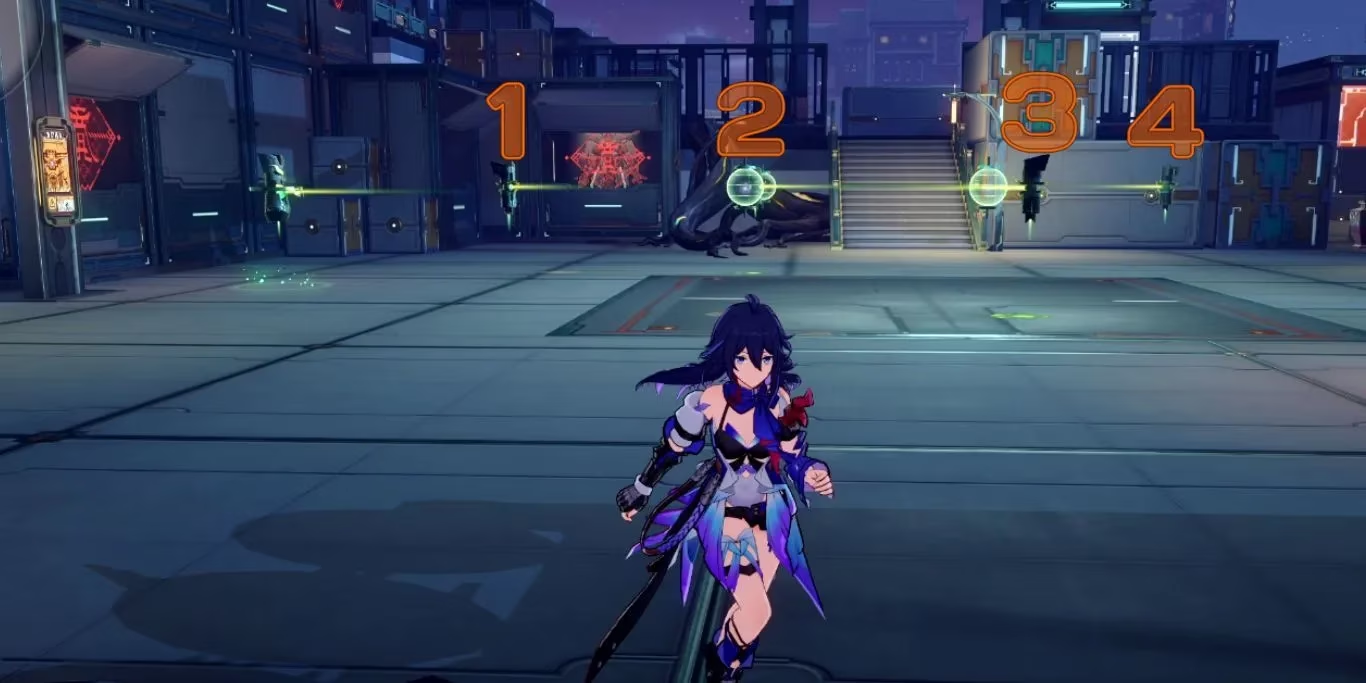
Day two added movement bars, and that is when the puzzles became genuinely interesting. For the first board, I rotated the pillar to the right of the launcher counter-clockwise three times. The second pillar, which had a movement bar above the first, was already facing the right way, so I only moved it to the left side. The third pillar had a movement bar at the bottom; I moved it left and rotated it clockwise twice. Finally, I rotated the top-right pillar counter-clockwise twice.
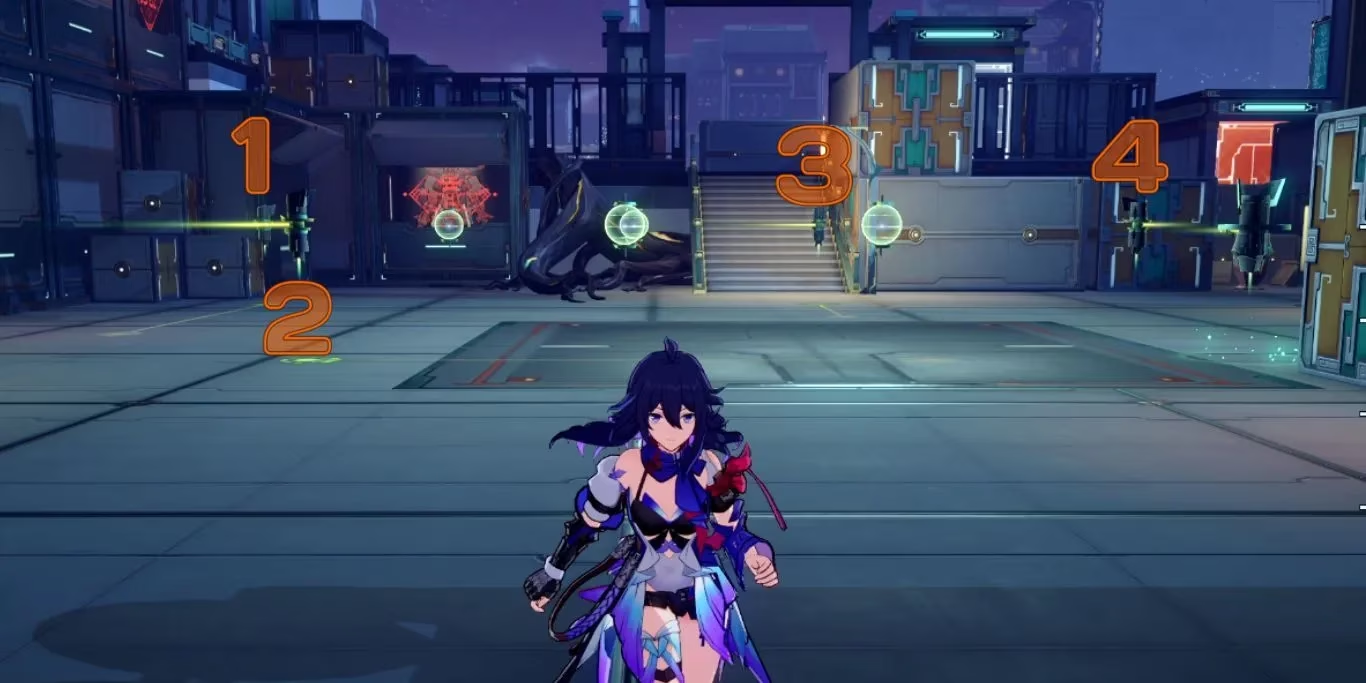
The second puzzle had its launcher on the right side. The first pillar on the left was already in position, so I rotated it counter-clockwise twice. The second pillar had a movement bar at the bottom; I moved it right and rotated it clockwise twice. The third pillar at the top was already correct, so I left it alone. Then I rotated the pillar just above the launcher four times in any direction.
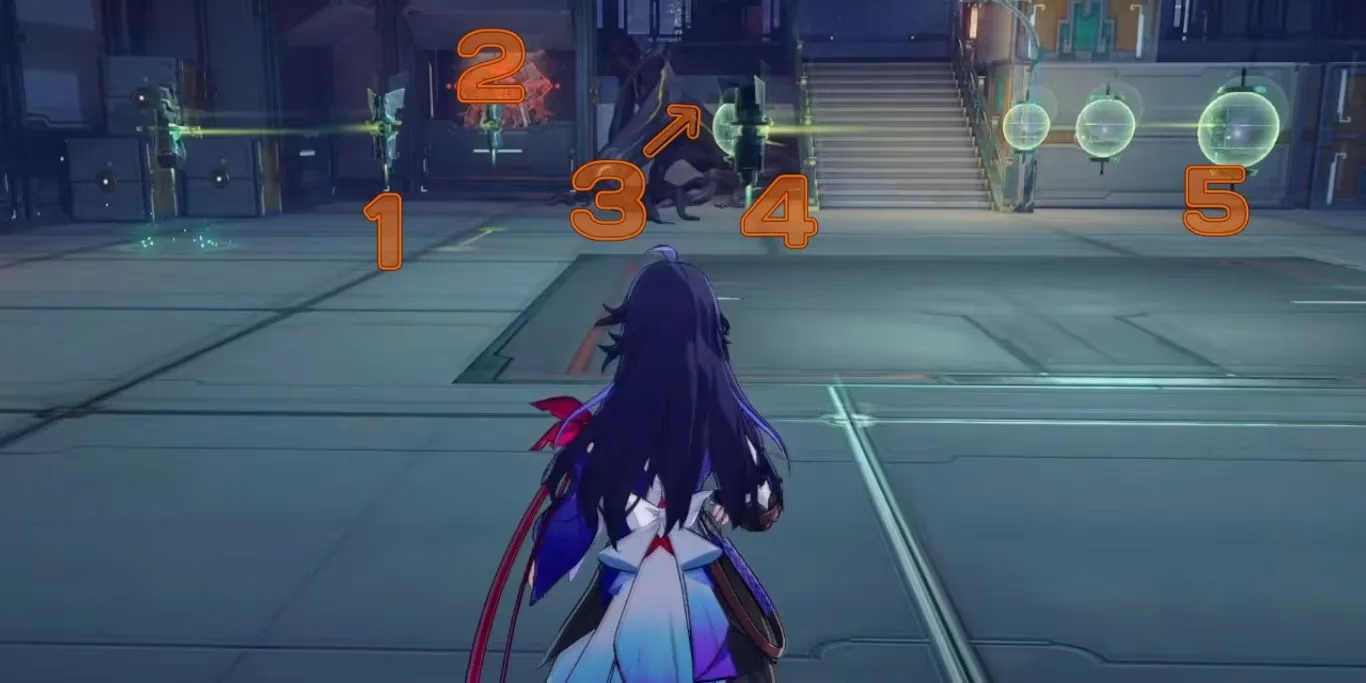
The third puzzle was the most confusing part of day two. I rotated the left pillar without a movement bar counter-clockwise once. The left pillar with a movement bar had to be moved down first, then rotated counter-clockwise three times. The pillar to the right of the second one needed one counter-clockwise rotation. The bottom pillar needed one clockwise rotation. Finally, the right pillar with a movement bar had to be moved downward and rotated counter-clockwise once.
Day three: the final tests
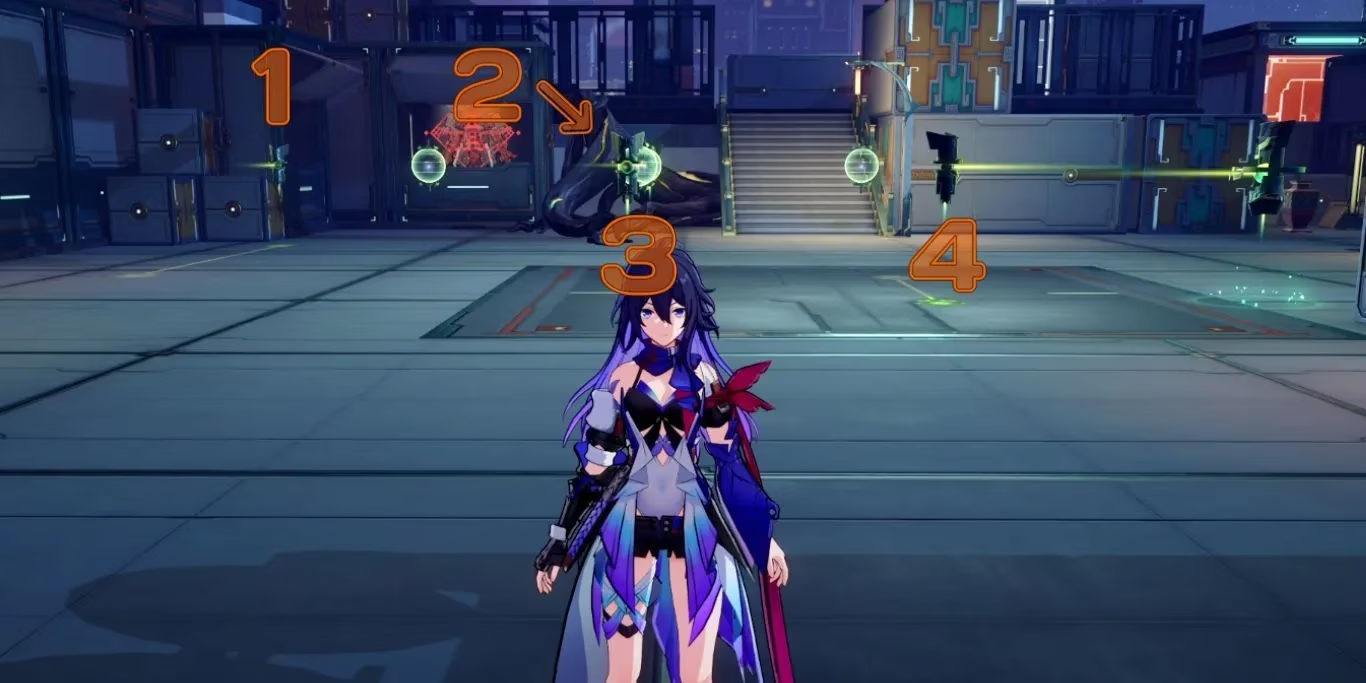
After the second server reset, I felt ready for the last set. On the first day-three puzzle, I moved the left pillar with a movement bar down and rotated it counter-clockwise twice so it faced left. The top pillar needed two counter-clockwise rotations to face northwest. The bottom pillar without a movement bar needed four rotations in any direction to face upward. The final pillar with a movement bar had to be moved upward and rotated counter-clockwise three times.
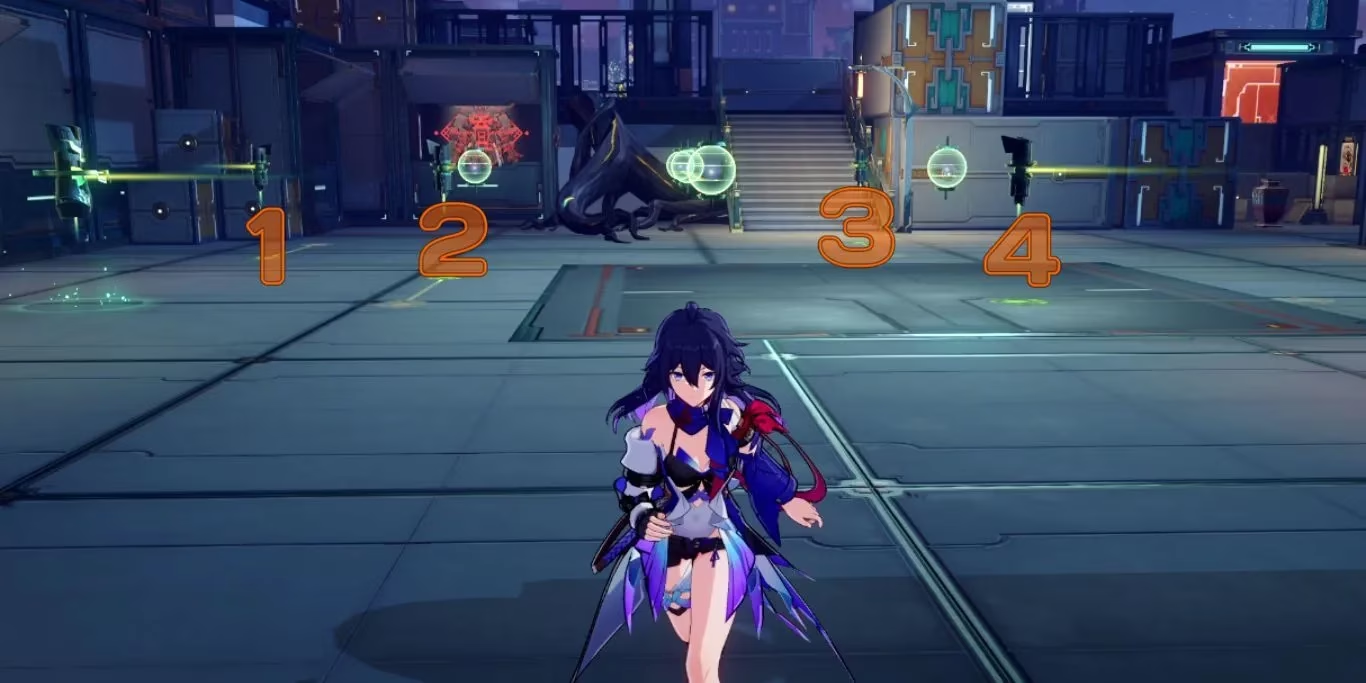
For the second puzzle, I moved the pillar right above the launcher upward and rotated it clockwise three times. The middle-bottom pillar was already in the correct position, so I only rotated it clockwise twice. The top-right pillar was also correctly placed, and I rotated it counter-clockwise three times to face southwest. The bottom-right pillar needed four rotations in any direction to face northwest.
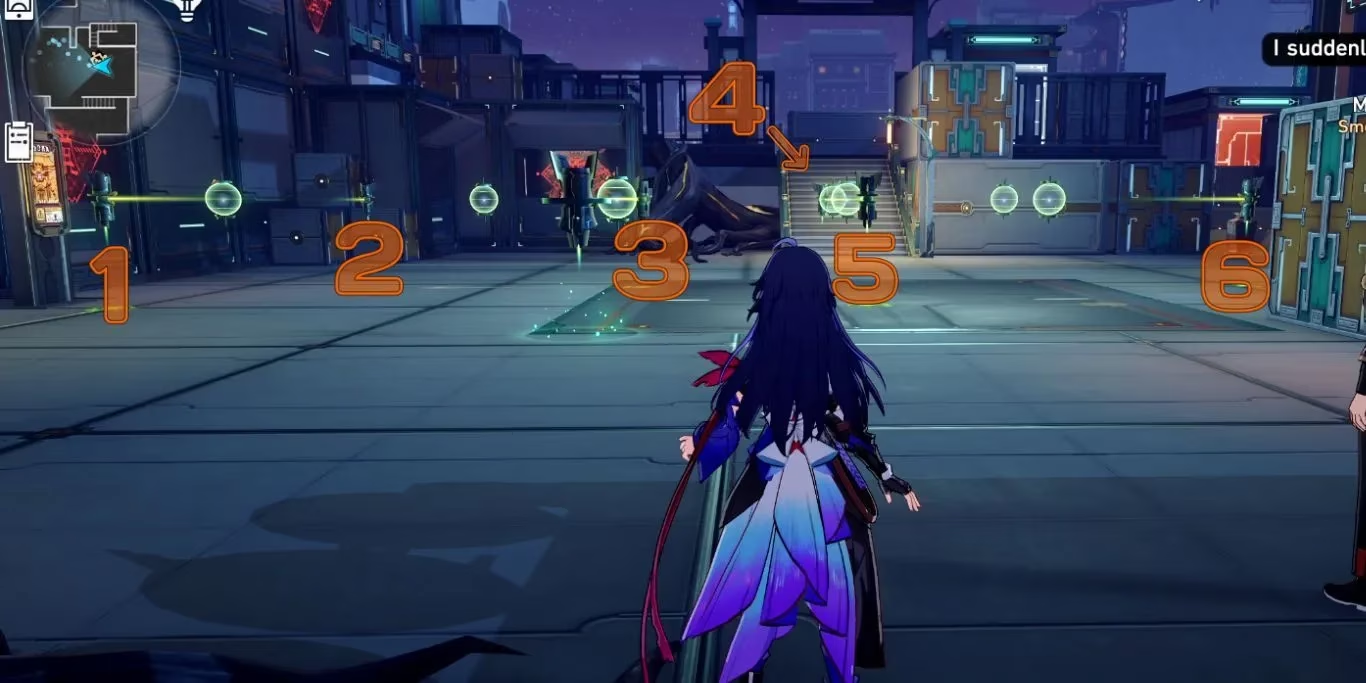
The last puzzle felt like a final exam. I moved the pillar to the left of the launcher upward and rotated it counter-clockwise three times. The middle-right pillar, where the launcher was facing, had to be moved right and rotated clockwise once. The left pillar at the top needed to be moved left and rotated counter-clockwise once. The right pillar at the top stayed in place but rotated clockwise twice. The fifth pillar, in the middle top-right of the launcher, had to be moved left and rotated clockwise twice. Finally, I rotated the bottom-right pillar counter-clockwise three times.
My final thoughts
By the end, I had a strange fondness for these little light beams. The Luminflux Pyxis chain is not the flashiest content in Honkai: Star Rail, but it is a nice change of pace from combat and relic grinding. It rewards patience, careful counting, and a bit of spatial imagination. If you get stuck, remember that the puzzle is re-doable, so there is no penalty for experimenting. I would recommend doing it over three relaxed sessions, just as Master Gongshu intended. 😊